Been there? We all have — Halloween candy spilling out of bowls, Christmas cookies glomming up tins or Valentine’s chocolates sitting abandoned in the pantry. So why let these treats go stale or chuck them out when you can turn them into something even more delicious?
Those leftover cookies and candy are treasure, baby treasure, just waiting to become your absolute favorite new dessert. Your broken cookies, melted chocolate bars and little bags of candy from last month’s holiday can be recycled into mouthwatering creations that’ll have everyone begging for seconds. You’ll also save money, you’ll squander less food — and, if you’re willing to consider offal, for example, you may be surprised by new flavor combinations that pop up.
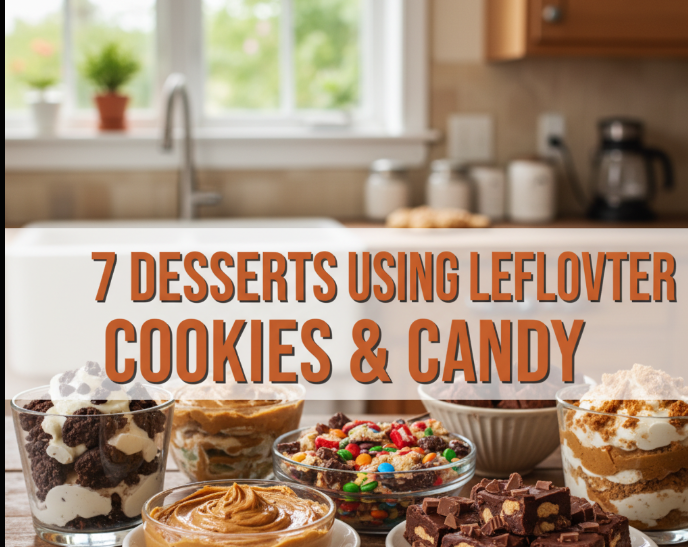
This guide will teach you how to make seven magnificent desserts with those extras languishing in your cupboard. From bare-bones no-bake nothings to showy bakery items, they work with almost any cookie or candy you’ve got lying around. Let’s make those leftovers into showstoppers!
Ice Cream Cookie Cake: My Dream in the Freezer
Nothing quite trumps the power of ice cream and cookies, which stacks them beautifully in layers here. This dessert is fancy enough for birthdays, but requires no special skills or equipment.
What You’ll Need
- 2-3 cups of crushed cookies on hand (any kind: chocolate chip, Oreos, sugar cookies, or mix)
- 1/2 gallon ice cream (your favorite flavor) — softened
- 1 cup chopped candy (M&Ms, Reese’s cups, or candy bars)
- Optional: whipped cream and additional candy for sprinkling over top
How to Make It
Begin by crushing your cookies into a medley of textures — some fine crumbs, and larger chunks for texture. Line a 9×13 inch pan with plastic wrap, leaving an overhang (makes removal super easy). Scatter the bottom half of the crushed cookies over it and press gently.
Allow your ice cream to sit at room temperature for 10-15 minutes until spreadable, but not too melted. Spread half the ice cream over the cookie base, then scatter over half your chopped candy. Top with another layer of cookies and remaining ice cream, then scatter over the rest of your candy and cookie crumbs.
Cover with plastic wrap and freeze for a minimum of 4 hours to overnight. To serve, lift out the entire cake by the overhanging plastic wrap, slice the terrine, and watch everyone’s eyes light up. There’s a lot to love about this dessert, since you can easily adapt it depending on whatever cookies and candy you’ve got laying around.
Pro Tips for Success
It essential to work quickly with the ice cream here so it doesn’t melt entirely. If it is getting too soft, transfer everything back to the freezer for 15 minutes before proceeding. You can also make flavor themes — chocolate cookies and mint candy for a chocolate-mint version, say, or vanilla cookies and fruit candies for something fruitier.
These Are Just Little Bite-Size Pieces Of Heaven!
These adorable cookie cups have a melted candy surprise waiting inside of them that just make every bite an adventure. They’re great for parties, bake sales or when you want to make an impact on the quiet.
Ingredients Required
- 1 package refrigerated cookie dough (or whatever leftover cookie dough you have)
- 24-30 mini candy bars or candy bites (such as Snickers, Milky Way, peanut butter cups, or caramels)
- Mini muffin tin
- Optional: sea salt or crushed candy for garnishing
Step-by-Step Instructions
Preheat your oven as directed on the cookie dough package (typically 350°F). Generously spray the mini muffin tin with cooking spray—you’ll be glad you did. Pinch off a small amount of cookie dough and press it in each muffin cup, making a little well in the middle.
Add a miniature candy bar to each cookie cup, pushing down so that it is slightly embedded. Most of the candy should be covered with dough, on the edges. Bake 10-14 minutes, or until the edges of the cookies are light golden brown. Inside, the candy will melt and that’s how we get a gooey center.
Cool in the pan for about 5 minutes before removing, as they will be too soft to remove straightaway. Then what I like to do is use a butter knife to gently go around and pull each cookie cup out and transfer onto a cooling rack. The candy firms a bit as it cools, though the middle remains pleasantly gooey.
Creative Variations to Try
Combine several type of candy in one batch for a variety. Use crumbled cookies, blended into your cookie dough, for additional taste and texture. Top caramel filled ones with sea salt to make them into a salted caramel, or simply sprinkle with powdered sugar for a classier touch.
No-Bake Cookie & Candy Truffles: Simple Elegance
When you want a fast dessert that appears as though you spent the day in the kitchen, these truffles see to it. They are professional-looking treats that include crushed cookies, candy and a few simple ingredients.
What Goes Inside
- 2 cups finely crushed cookies (vanilla wafers, graham crackers or other plain cookies are undeniably the best)
- 8 ounce block of cream cheese, at room temperature
- 1 cup crushed chunks of candy (set some aside for rolling)
- 1/4 cup powdered sugar
- Melted chocolate for dipping (not necessary, but you might as well)
Making the Truffles
Combine crushed cookies with softened cream cheese in a large bowl until smooth. The mixture must be wet enough that it sticks together when squeezed. Add your crushed candy and powdered sugar, stirring until all combined.
Use your hands to roll the mixture into 1 inch balls – a cookie scoop makes this super easy and helps them stay uniform in size. Transfer to parchment-lined baking sheets. From here, you can roll them in cookie crumbs, candy, crushed dried fruit or cocoa power — or stick them in the refrigerator while chocolate melts for dipping.
If you are a chocolate dipper, I use microwave-melted chocolate (30-second bursts in the microwave till melted, and then stirred to smooth). Either use a fork to dip each truffle, allowing any excess chocolate to run off before setting it back on the parchment paper. Sprinkle with crushed candy right before the chocolate begins to set.
Chill for at least 1 hour before serving. Truffles can be kept in the fridge for up to a week or frozen for up to a month.
Flavor Combinations That Work Magic
White chocolate-covered Oreos dusted in crushed candy cane are a cookies-and-cream peppermint delight. Chocolate chip cookies coated in peanut butter candy with crushed Reese’s pieces – a peanut butter lover’s dream! Lemon candy on Vanilla cookies make for a tangy citrus truffle.
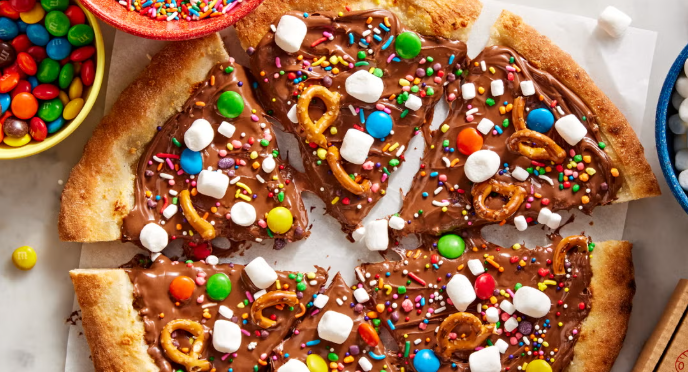
And now the best snack ever – Loaded Cookie Candy Bark
With this colorful, customizable bark barely 20 minutes of active time transform a plethora of leftovers into something new. It’s great for gifting or freezer-storing for sweet emergencies.
Ingredient Checklist
- 2 cups chocolate chips (can use milk, dark or white—or a combo)
- 1-2 cups crushed cookies (mixed works well here)
- 1 to 2 cups mixed candy, chopped if large
- Assorted mix-ins: Pretzels, nuts, dried fruit, sprinkles
Creating Your Bark
Line a baking pan with parchment paper or silicone mat. Melt your chocolate in the microwave, stirring every 30 seconds until it’s all melted and smooth. Pour the melted chocolate onto the prepared sheet and use an offset spatula to spread it into a rectangle about 1/4 inch thick.
While the chocolate is still wet, sprinkle all of your crushed cookies and candy pieces evenly over the top, pressing down gently until they stick in the chocolate. Have some fun with how you lay them out—you could do a pattern it you want, but chaos is pretty too.
Place the whole sheet into the refrigerator for 30 minutes or so until chocolate is completely hardened. Once it’s set, shatter the bark into uneven shards — that rugged appearance is half its beauty.
Storage and Gifting Ideas
To store, keep bark in an airtight container with parchment paper between layers to avoid sticking. It stores in the fridge for two weeks or in the freezer for two months. For gifts, you can put pieces in clear cellophane bags tied with ribbon or in decorative tins.
Cookie Crumb Cheesecake Cups: Individual Indulgence
These petite cheesecakes have cookie crusts, candy toppings and make for a personal dessert that can be enjoyed by the slice (or two).
Ingredients List
- Crushed Cookies for crust (about 1.5 cups)
- 3 tablespoons melted butter
- 16 oz block of cream cheese, room temperature
- 1/2 cup sugar
- 2 eggs
- 1 teaspoon vanilla extract
- Assorted chopped candy for topping
- Muffin tin and paper liners
Preparation Method
Preheat your oven to 325°F and prep a muffin tin with paper liners. Combine crushed cookies with melted butter, mixture will be wet and sandy. Evenly press about 1 tablespoon of the mixture into each liner, pressing down firmly to pack it in.
In a medium bowl, beat cream cheese with sugar until smooth and creamy (2-3 minutes). Add eggs, one at a time, beating well after each addition; mix in vanilla. Pour the cheesecake filling over each crust to about 3/4 full.
Bake 18-22 minutes or until the centers are just set but still slightly wiggly. They’ll firm up as they cool. Let them cool completely in the pan before refrigerating for at least 2 hours.
Just before serving, sprinkle chopped candy pieces on the miniature cheesecakes. You can also add a drizzle of melted chocolate or caramel sauce for even more decadence.
You may also like: 5-Minute Cheesecake Cups Everyone Loves
Tips for Perfect Mini Cheesecakes
Use room temperature cream cheese — cold will result in lumps. Don’t overbake these — they should still be a bit wiggly in the center when you take them out of the oven. If it splits on top, fret not — the candy topping will cover any cracks perfectly.
Candy Cookie Bread Pudding: Next-Level Comfort
This warm, custardy dessert — a mash-up among bread pudding and cookies and candy — turns leftover cookies into something truly magical. It’s the ultimate comfort food, only way more fun.
What You Need
- 4-5 cups crushed cookies or cookie pieces (stale is fine!)
- 1 cup chopped candy or candy bars
- 4 eggs
- 2 cups milk (whole is the best)
- 1/2 cup heavy cream
- 3/4 cup sugar
- 2 teaspoons vanilla extract
- 1/2 teaspoon cinnamon (optional)
- Butter for greasing the pan
Cooking Instructions
Butter a 9×13 inch baking dish. Break cookies into bite-size pieces if they’re not already broken — a mix of sizes lends good texture. Arrange the pieces of cookie and half of the candy in the bottom of prepared dish.
Whip the eggs, milk, cream, sugar, vanilla and cinnamon together. Pour the custard mixture over the cookies, pressing them down lightly to help soak up the liquid. Leave for 15-20 mins so the cookies can soak up the custard.
Sprinkle the remaining candy over the top. Bake at 350 degrees for 45-55 minutes or until the top is golden brown and the center is set but soft. A knife inserted in the center should come out mostly clean with a few moist crumbs.
Serve warm with a dollop of whipped cream, ice cream or drizzled with caramel sauce. And the dessert is even better the next day after the flavors have had a chance to meld.
Making It Extra Special
For those who adore chocolate, fold a handful of chocolate chips into the custard mixture. Substitute some of the milk with coffee for a caffeinated, mocha version. Use seasonal candy to make holiday versions — candy canes for Christmas, pastel candies for Easter or candy corn in the fall.
Cookie Candy Milkshake: Drinkable Dessert
When you need something cold, sweet and a little (or a lot) over-the-top, this monster shake has your number. It’s dessert in a glass, perfect for sizzling days or when you need something that feels like a treat.
Ingredients Needed
- 3-4 heaping scoops of ice cream (vanilla goes with everything)
- 1/2 cup milk (more if you prefer a thinner shake)
- 1/2 cup crushed cookies
- 1/2 cup candy pieces, chopped
- Whipped cream for topping
- Additional cookies and candy, for garnish
Blending Instructions
Place the ice cream, milk, half the crushed cookies and half of each candy in a blender. Purée on medium until smooth but still thick. You need it to be drinkable out of a straw, but not a watery soup. If it’s too thick, add milk 1 tablespoon at a time. Add more ice cream if it’s too thin.
Divide between large glasses, with space left at the top for toppings. Top with a nice swirl of whipped cream and go nuts with your garnishes. Affix cookies to the edge of the glass, sprinkle crushed candy on top and even place a mini candy bar on for decoration.
For an extra-thick, spoonable version that’s closer to soft-serve ice cream, use less milk. For a malt shop version, add 2 tablespoons of malted milk powder to the blender.
Creative Serving Suggestions
Rim the glass with melted chocolate, and crushed candy before pouring in the shake. Make a candy-cookie “skewer” by sliding mini cookies and/or candy onto a wooden skewer and use them as edible stir sticks. Turn it into a float by adding a scoop of ice cream to the top of each serving after pouring.
Desserts Difficulty and Time Comparison
| Dessert | Difficulty Level | Active Time | Total Time | Required Equipment |
|---|---|---|---|---|
| Ice Cream Cake | Easy | 20 minutes | 4+ hours (freeze) | Pan, optional stand mixer |
| Cookie Cups | Easy | 15 minutes | 30 minutes | Mini muffin tin, oven |
| Truffles | Easy | 25 minutes | 1.5 hours (chill) | Stand mixer, cookie scoop |
| Candy Bark | Very Easy | 15 minutes | 45 minutes (with setting) | Baking sheet, microwave |
| Cheesecake Cups | Moderate | 30 minutes | 3+ hours (chill) | Muffin tin, mixer, oven |
| Bread Pudding | Easy | 25 minutes | 1.5 hours | Baking dish, oven |
| Milkshake | Very Easy | 10 minutes | 10 minutes | Blender |
Hints for Working With Leftover Desserts
Storage: Store cookies in airtight containers before using. Candy should be in cool dry places and away from heat. Even slightly stale cookies are just as perfect in these recipes — in many cases, they actually soak up flavors more effectively.
Mix and match: Don’t be afraid to use a variety of cookies and candy! Chocolate and peanut butter are never a problem. Vanilla cookies go well with fruit candies. Mint candy can always make anything taste both refreshing and cool.
Balance Textures: Make sure you have both crunchy and smooth textures in your desserts. Smashed cookies give crunch, while candy adds chewy or melty texture. This contrast keeps each bite interesting.
Temperature Control: Many of these recipes feature some aspect of chocolate or ice cream, so be mindful of temperatures. Keep your frozen ingredients frozen until you are ready to use them, and not moving too slowly when combining hot and cold ingredients.
Portion Control: These treats are decadent and indulgent, so a little goes a long way. Filling mini muffin tins or making individual servings makes portion control easier, but they may be served in larger portions as well.
Money-Saving Benefits of Using Leftovers
Real money is saved when we reduce food waste. The average household throws out hundreds of dollars worth of food each year, and holiday candy and cookies are top offenders. Not to mention, by using them in a new dessert, you’re double-dipping and therefore feel even more justified about indulging.
Specialty desserts from the store can average $5-10+ per serving at a bakery. Purchasing these recipes elsewhere will cost you dollars per serving, while making them at home costs pennies. One batch of cookie bark costs about $3 in chocolate, but you’re eating through $10-15 worth of leftover candy and cookies that you probably would’ve just trashed.
And these recipes call for fewer specialty ingredients than preparing a dessert from scratch. You don’t have to invest in vanilla beans, extracts made from far-off places or fancy nuts when you are making your crust with these pre-flavored cookies and candy that already contain them.

Frequently Asked Questions
Can I use any cookie in these recipes?
Yes! The recipes here are meant to be flexible. Chocolate chip, sugar cookies, Oreos, graham crackers, shortbread — even cookies you’ve made yourself — all work. Certain types serve some recipes better than others, including: Plain cookies like vanilla wafers for truffles and bread pudding; any cookie in ice cream cake or bark.
How long do these sweets keep?
It depends on the recipe. Consume cake and milkshakes within days. Truffles and cheesecake cups keep in the fridge for a week. Cookie cups keep well for 3-4 days in an airtight container. Bark will keep in the refrigerator for two weeks. Bread pudding can be covered and stored in the fridge for 4-5 days.
But what if my cookies are also really stale?
Perfect! Stale (or staled) cookies work even better in many recipes, as they absorb liquids and flavors more readily. Bread pudding, ice cream cake and truffles all benefit from just slightly stale cookies. Just stay away from cookies that are spoiled or moldy — stale is O.K., but spoilage is not.
Can I prepare all these recipes ahead of time for parties?
Absolutely. The ice cream cake, the truffles, the bark and the cheesecake cups are all perfect desserts for making in advance. You can also cook the patties 1-2 days ahead and store them in the refrigerator or freezer. Cookie cups can be baked 1 day ahead and kept in airtight containers. Top with some garnishes and toppings just before serving.
Are these recipes kid-friendly to make?
Almost all of these recipes are ideal for kids to help make. All the recipes for bark, truffles, milkshake and ice cream cake are oven-free and based on mixing or decorating — things kids can help with. The cookie cups and the cheesecake cups require some time in the oven, so an adult must be present. Bread pudding calls for knife skills and the oven, so this is a better project for older kids or activities supervised by an adult.
What’s the most effective method for crushing cookies?
Several methods work well. For smashing (with a little control) to different sizes: Put the cookies in a resealable plastic bag and hit them with a rolling pin. A food processor will give you the finest, most even crumbs. Split them by hand for a more rustic, uneven texture. Choose according to the texture you’re after: fine crumbs for crusts, a range of sizes for toppings and mix-ins.
Can I make ingredient substitutions if I have an allergy?
Many substitutions work. Make dairy-free versions by using dairy-free ice cream, cream cheese and chocolate. These recipes are celiac-friendly, too; all the way down to cookies that are gluten-free. For nut allergies, just steer clear of candy with nuts and read cookie ingredients. So many recipes are adjustable to make room for other dietary needs with just a few substitutions.
How can I keep chocolate from seizing when melting?
Leave all equipment bone dry — chocolate seizes to graininess at the mere drop of moisture. Melt chocolate in the microwave in short bursts, stirring between each burst. Do not over warm it, because even after you’ve removed the chocolate from its heat source (microwave or double boiler), it will continue to melt from internally generated heat. If the chocolate seizes, stir in a teaspoon of vegetable oil to smooth it out.
Taking Full Advantage of Holiday Leftovers
After the holidays, we are left with certain kinds of candy and cookies that these recipes can remedy. Halloween candy is great for bark, cookie cups and truffles, particularly fun-size candy bars. They’re perfect for bread pudding and ice cream cake, in particular if you have assortment packs from a cookie exchange. Valentine’s chocolate also makes good truffles and melts beautifully for bark. Easter candy with its pastel hues serves as a burst of color in milkshakes and cheesecake toppings.
Plan ahead during holidays with a purposeful surplus of candy and cookies you know you’ll churn into something else later. This tactic results in a net savings, since holiday candy typically gets clearanced out after the holidays are over—up to 50-75% off, in some cases.
Final Thoughts on Sweet Transformations
The dregs of cookies and candy are not trash — they are an inspiration. These seven desserts show that second-hand ingredients lead to first-rate treats, some of which can even compete with something from a bakery. Whether you are seeking an easy fix with candy bark, or a showstopping ice cream cake for celebrations of all sorts, these recipes have got it all for you.
The great thing about these desserts is that you can forgive them. You can’t do this excessively because you are limited to ingredients that already taste good. Combine and go with what you have, try mixing flavors, but most of all — enjoy.
It’s time to stop feeling guilty for those extra sweets in your pantry. Rather, think of them as ingredients longing to be your next dessert masterwork. Your wallet, your tastebuds and the planet will thank you for saving waste and making something delicious. Now it’s time to get those cookie crumbs and candy pieces out and build something awesome!