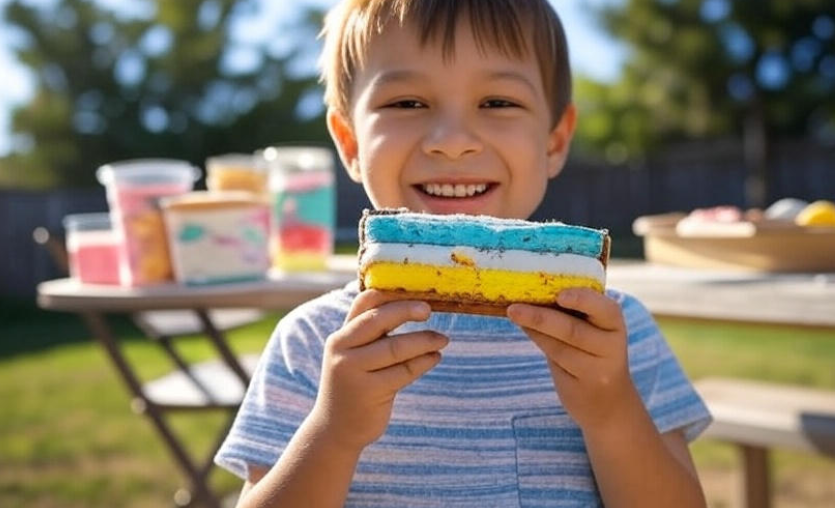
If there’s one treat that makes kids’ eyes light up, it’s definitely ice cream sandwiches! 🍦 They’re sweet, fun, and perfect for a quick snack or a little party treat. But why settle for store-bought when you can make your very own at home? Making DIY ice cream sandwiches is not only super easy, it’s also a fun activity to do with your little ones.
Why Make Your Own Ice Cream Sandwiches
Store-bought ice cream sandwiches can be tasty, sure. But making them at home has some cool perks:
You get to choose the flavors your kids love. Chocolate, vanilla, strawberry—mix and match!
You can use healthier ingredients if you want, like whole-grain cookies or low-sugar ice cream.
It’s a fun activity for kids. They can help assemble the sandwiches and even decorate them.
You can customize sizes—perfect for little hands.
Ingredients You’ll Need
You don’t need a long list of fancy ingredients. Here’s a simple table of what works best:
| Ingredient | Notes | Optional Additions |
|---|---|---|
| Cookies | Any type works: chocolate chip, oatmeal, or sugar cookies | Sprinkle with cinnamon or cocoa powder |
| Ice Cream | Any flavor your kids love | Try fruity sorbets for a healthier twist |
| Chocolate Chips | For rolling the edges | Can melt slightly for easy sticking |
| Sprinkles | For decoration | Mini marshmallows or crushed nuts |
| Nut Butters | Optional for a creamy layer | Peanut butter, almond butter |
Step-by-Step DIY Instructions
Step 1: Choose Your Cookies
You can use store-bought cookies or bake them fresh. Make sure they’re slightly soft because crunchy cookies can break when you press the ice cream in.
Step 2: Scoop the Ice Cream
Take your ice cream out of the freezer and let it soften for a couple of minutes. This makes it easier to scoop and spread. You can use a spoon or an ice cream scoop.
Step 3: Assemble the Sandwich
Place one cookie on a flat surface. Add a generous scoop of ice cream on top. Cover with another cookie and press gently to spread the ice cream evenly.
Step 4: Customize Your Edges
Here’s where the fun begins! Roll the sides of the ice cream in chocolate chips, sprinkles, or crushed nuts. Kids love this part—they get to be creative. 🎨
Step 5: Freeze Before Serving
Even though tempting, your ice cream sandwich needs a bit of chill. Place it in the freezer for about 30 minutes so it holds together. After that, it’s ready to eat!
Low-calorie option: 8 Guilt-Free Desserts Under 150 Calories
Fun Variations to Try
Chocolate Lovers: Use double chocolate cookies and chocolate ice cream. Add mini chocolate chips on the edges.
Fruity Fun: Use sugar cookies with strawberry ice cream and crushed freeze-dried berries on the sides.
Nutty Delight: Add a thin layer of peanut butter inside before the ice cream. Roll edges in crushed nuts.
Mini Sandwiches: Use smaller cookies to make bite-sized treats perfect for parties.
Tips for Success
Soft Cookies Work Best: Hard cookies can crack when pressing the ice cream.
Ice Cream Should Be Slightly Soft: This prevents smashing the cookies.
Use Parchment Paper: For freezing, place sandwiches on parchment paper so they don’t stick together.
Experiment With Flavors: Don’t be afraid to mix unusual flavors—vanilla and caramel, chocolate and mint… the possibilities are endless!
Why Kids Love DIY Ice Cream Sandwiches
They get to choose the flavors and toppings.
Kids love hands-on activities—assembling the sandwiches makes them proud of their creation.
It’s sweet but manageable—you can control portion size.
Kids love the colorful and playful decorations like sprinkles and chocolate chips.
Healthier Alternatives
You don’t have to feel guilty about this treat. Try these small tweaks:
Use whole grain or oat cookies instead of regular cookies.
Choose low-sugar or frozen yogurt ice creams.
Add fruit slices like banana or strawberries inside for extra nutrients.

DIY Ice Cream Sandwiches Kids Will Love
Table: Healthy vs Fun Options
| Option | Fun Factor | Health Factor | Ideal Age |
|---|---|---|---|
| Chocolate chip cookies + vanilla ice cream + sprinkles | ★★★★★ | ★★☆☆☆ | 3+ |
| Oatmeal cookies + frozen yogurt + banana slices | ★★★★☆ | ★★★★☆ | 2+ |
| Sugar cookies + strawberry ice cream + freeze-dried berries | ★★★★☆ | ★★★☆☆ | 3+ |
| Mini cookies + ice cream + mini marshmallows | ★★★★★ | ★★☆☆☆ | 3+ |
FAQs About DIY Ice Cream Sandwiches
Q: Can I make them ahead of time?
Yes! You can assemble them and store them in the freezer for up to 1 week. Just make sure to wrap each sandwich in parchment or plastic wrap to prevent freezer burn.
Q: Can I use soft cookies like brownies?
Absolutely! Brownie pieces make deliciously chewy sandwiches. Just cut them into even squares.
Q: What if the ice cream melts too quickly?
Work fast and keep the ice cream slightly soft, not fully melted. Also, chilling cookies in the fridge before assembly helps.
Q: Can these be allergy-friendly?
Yes. Use dairy-free ice cream and gluten-free cookies. There are many kid-friendly alternatives available now.
Q: Any tips for decorating?
Use a shallow bowl for sprinkles or chocolate chips. Roll the sides gently for full coverage. Kids love adding extra colors and textures.
Final Thoughts
DIY ice cream sandwiches are more than just a treat—they’re an experience. 🍪🍦 Kids can have fun creating, experimenting, and enjoying their sweet masterpieces. Plus, you get to make them exactly the way you want, controlling flavors, sweetness, and size.
Next time you want to surprise your kids or throw a small party, skip the store-bought ones. Get creative, mix flavors, roll the edges in fun toppings, and watch their faces light up with joy. Ice cream sandwiches aren’t just snacks—they’re memories in the making.


